Support / Help Center / Admin Help Center / Adding Company Data
Adding Company Data

Roar V. Bovim
CEO & Founder @Livingroom
When you have successfully completed the Livingroom wizard, the first thing to do is to set up the data needed for running surveys with Livingroom. In the following sections, we will take you through the basics of adding data to Livingroom:
- Adding Company Data;
- Adding Teams;
- Adding Employees.
NOTE: It is crucial that you always keep this information up to date. We recommend that the data is updated on a regular basis. Your HR data in Livingroom is easy to access and edit and can be viewed exactly as in any HR software. You can either edit the information directly in Livingroom or you can upload new employees from an Excel list.
For adding company data, go to the menu bar in the left-hand side and click on Company.
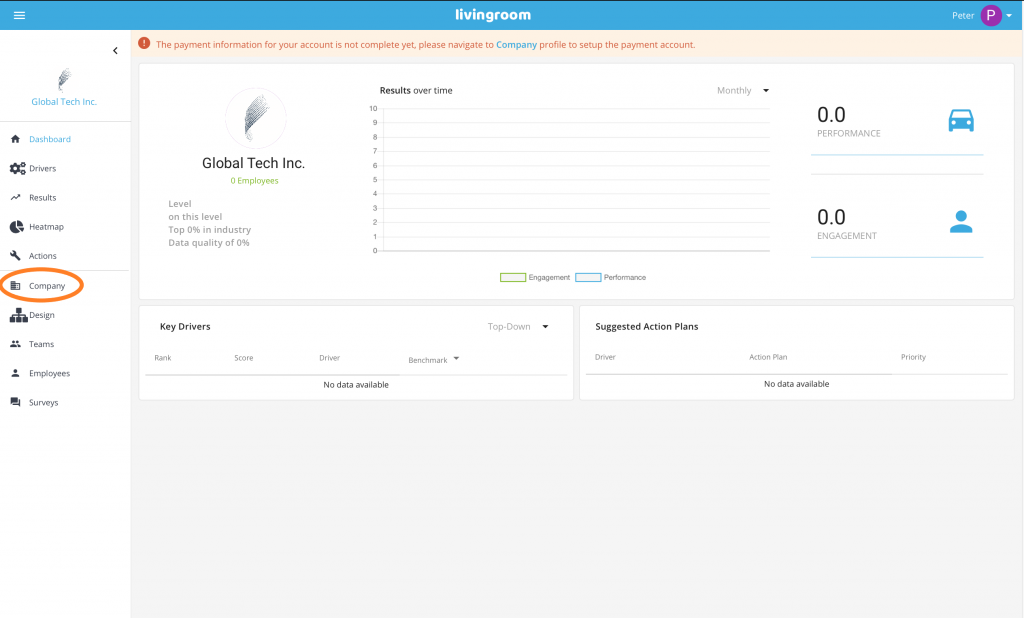
As in all setup pages in Livingroom, there will be additional setup sub-pages appearing in the horizontal menu (the one starting with “General”). Click on the text (General, Locations, Invoice, Account) in order to navigate among these sub-pages.
General Company Settings
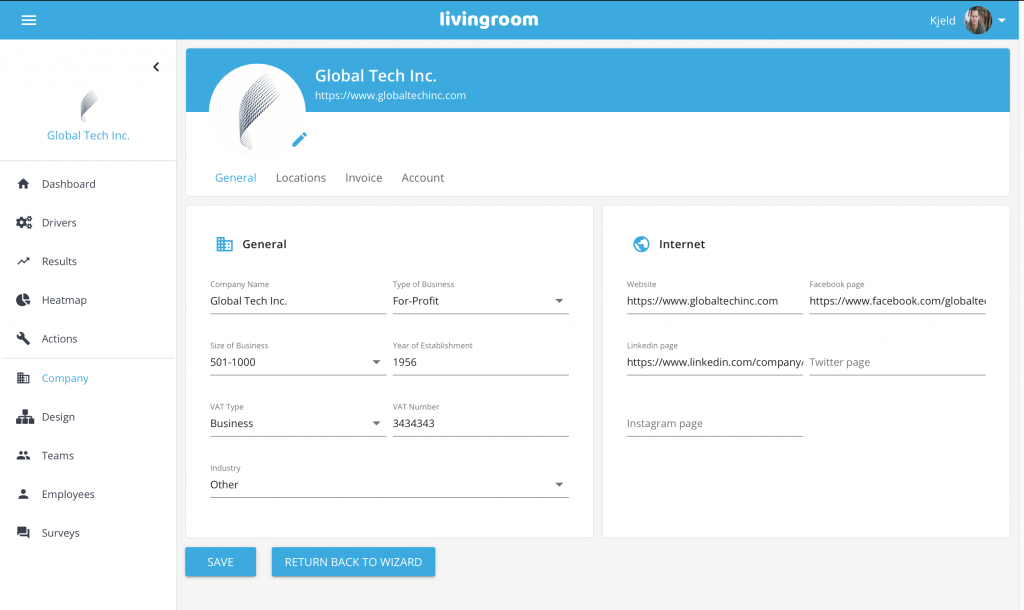
We already covered these settings briefly in the wizard. Let’s take a closer look at the settings. If you haven’t closed your wizard yet, it still says “Return back to wizard” as in the case below.
- Your company name. This serves as your official company name so make sure it’s correct. If you change the company name, remember that it will affect employee apps as well as workplace surveys;
- Choose the size of your business. By clicking on the field, you will see a drop-down list with choices;
- Choose VAT type and VAT number. Even if you are just running a trial version, you will need to type in this information. Make sure to double-check your VAT number. It will be checked by Livingroom in order to comply with EU laws;
- Choose your Type of Business, Industry and Year of Establishment (optional). The industry type will be used by Livingroom to choose the right benchmark for your company;
- Online Business Sites (optional). Please provide the online sites of your business. Add your official company website as well as the social media pages your company operates (if relevant): Facebook page, Twitter page, LinkedIn page, and Instagram. Make sure you add working website addresses;
- Adding Company Logo (optional). Livingroom supports custom branding, for making a more seamless experience with Livingroom. Upload your company logo. The logo will be shown in the employee app. Press the pencil at the top circle and choose a picture file from your computer for upload. The logo should be your official company logo or alternatively another picture that best represents your whole company. Allowed picture formats: .jpg and .png. NOTE: for best result, the picture should be a square with equal height and width and not too big, preferable 400 x 400 pixels in size.
Click Save.
Company Locations
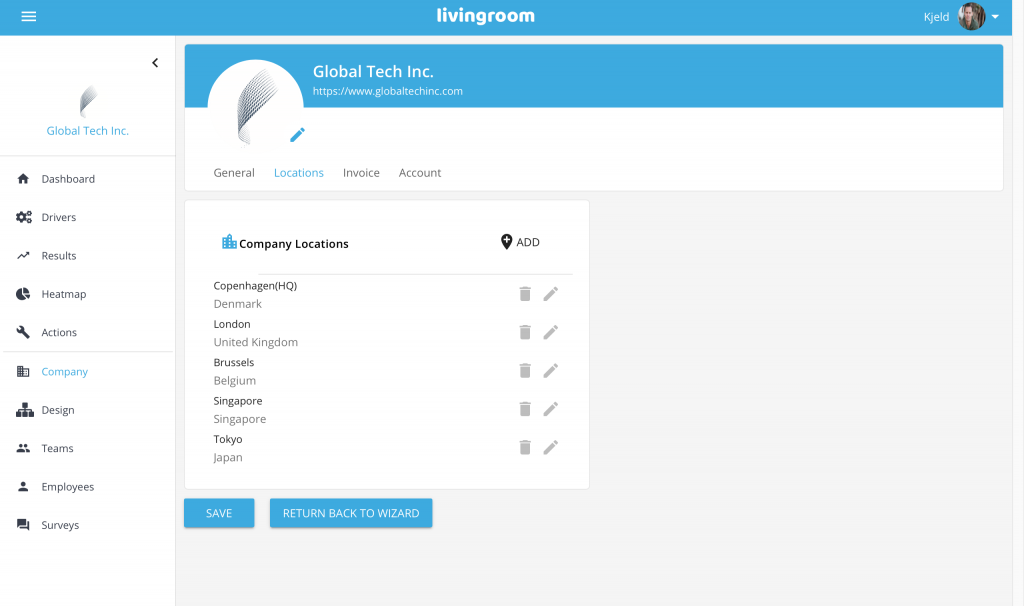
In the Locations submenu, you should add all the locations where your company has employees.
Press the +Add button and you will see a pop-up window. Add the following information:
- Location Name. Add a name for the location. It could be the city, e.g. Copenhagen or New York, a street address or a name that best represents this location. NOTE: Make sure you use a unique name for each of your company locations, making it possible to distinguish between your locations later on;
- Type of Business. What type of activities is going on here? If you don’t find a fitting activity in the dropdown, choose "Others";
- Office Phone, Address, City, State, ZIP and Country. Please add the address and phone number of your location. City, State, and ZIP are required fields.
Press Save.
Headquarters: When you successfully have added a new location and REOPEN the location, you will see a new choice called “Headquarters”. Make sure you reopen your headquarter location and mark it as the headquarter of your company.
NOTE: Adding locations for employees needs to be done in 3 steps:
- Add all available company locations in the Company settings;
- Add locations for a particular team - only added company locations will be available;
- Choose the particular location for the employee based on team locations.
Invoice and Billing Settings
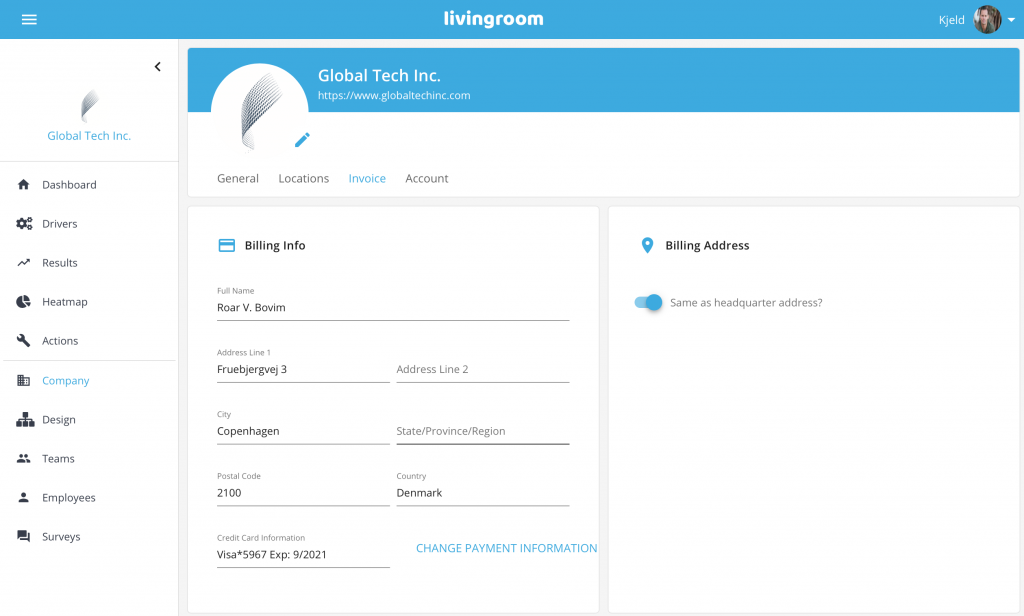
In the Invoice submenu, you can set up your billing information for your company. Please add a valid company credit card:
- Full Name;
- Address (Address, City, State, Postal code, Country). You can also choose to select your headquarters' address as the billing address by switching on the "Same as headquarter address?" option on the right of the page;
- Credit Card Information: Credit Card Number, Expire Month, and Security Code.
Submit the information and wait a second for credit card approval. The information will be sent to Stripe, our secure payment solution (see https://stripe.com for information about Stripe and Stripe Terms and Conditions).
Once you successfully have registered a credit card, the full credit card information is stored at Stripe and can no longer be viewed in detail in Livingroom. However, you can always change your payment information by pressing the blue Change Payment Information button.
For more information about how you are billed, please go to Billing.
Account Settings
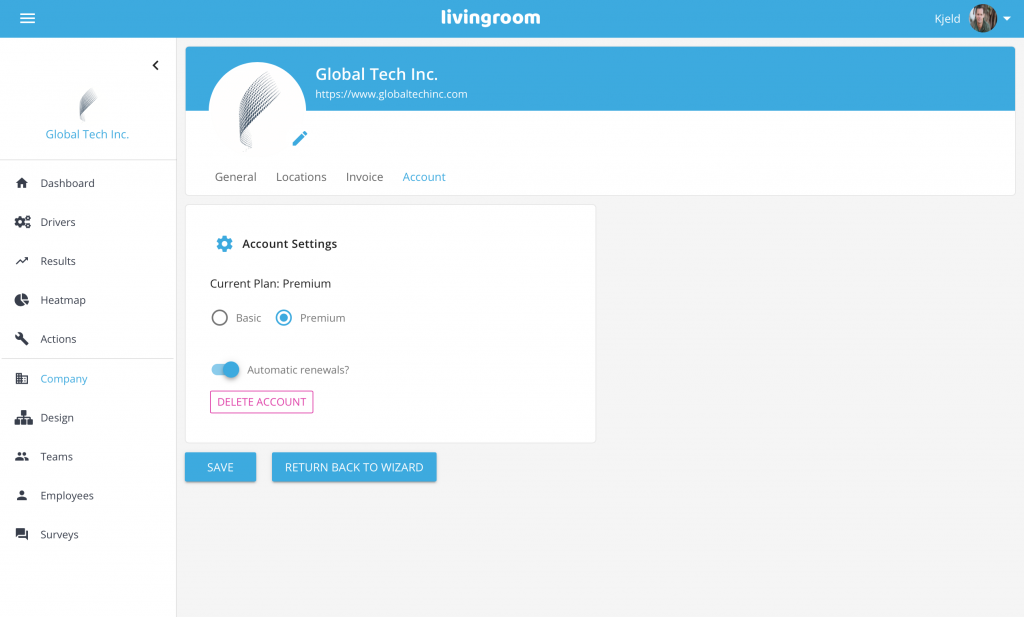
In the Account Subpage, you can control your account settings.
Here you have the possibilities to downgrade or upgrade your current Livingroom plan (for more information on this go to Changing Your Livingroom Plan).
NOTE: When downgrading your plan to Basic, you might lose information and data, as this plan DOES NOT SUPPORT complex organizational structures as well as your own added actions. We strongly recommend that you confirm with customer support and/or your Customer Success Manager before downgrading your account, that you discuss consequences of downgrading, and make sure that your valuable data is not lost.
